I remember the exact moment I realized turkey burgers didn’t have to be disappointing. I was at a friend’s backyard barbecue, biting into what I assumed would be yet another dry, flavorless patty, when suddenly my palate was hit with this extraordinary combination of smokiness and subtle sweetness. The culprit? A beautifully charred roasted red pepper nestled inside a juicy turkey burger that actually tasted like something worth eating. That afternoon completely changed how I approached ground turkey in the kitchen, and honestly, it’s kinda wild that more people aren’t making these.
The magic here isn’t just about the ingredients—though they’re certainly important. It’s about understanding how to coax maximum flavor out of a protein that’s often considered the “sad” option at a cookout. Turkey can be absolutely delicious when you treat it with the respect it deserves. The combination of roasted red peppers, with their natural sweetness that’s been concentrated through heat, paired with smoky undertones, creates a burger that’s genuinely exciting. This isn’t compromise food. This is the real deal.
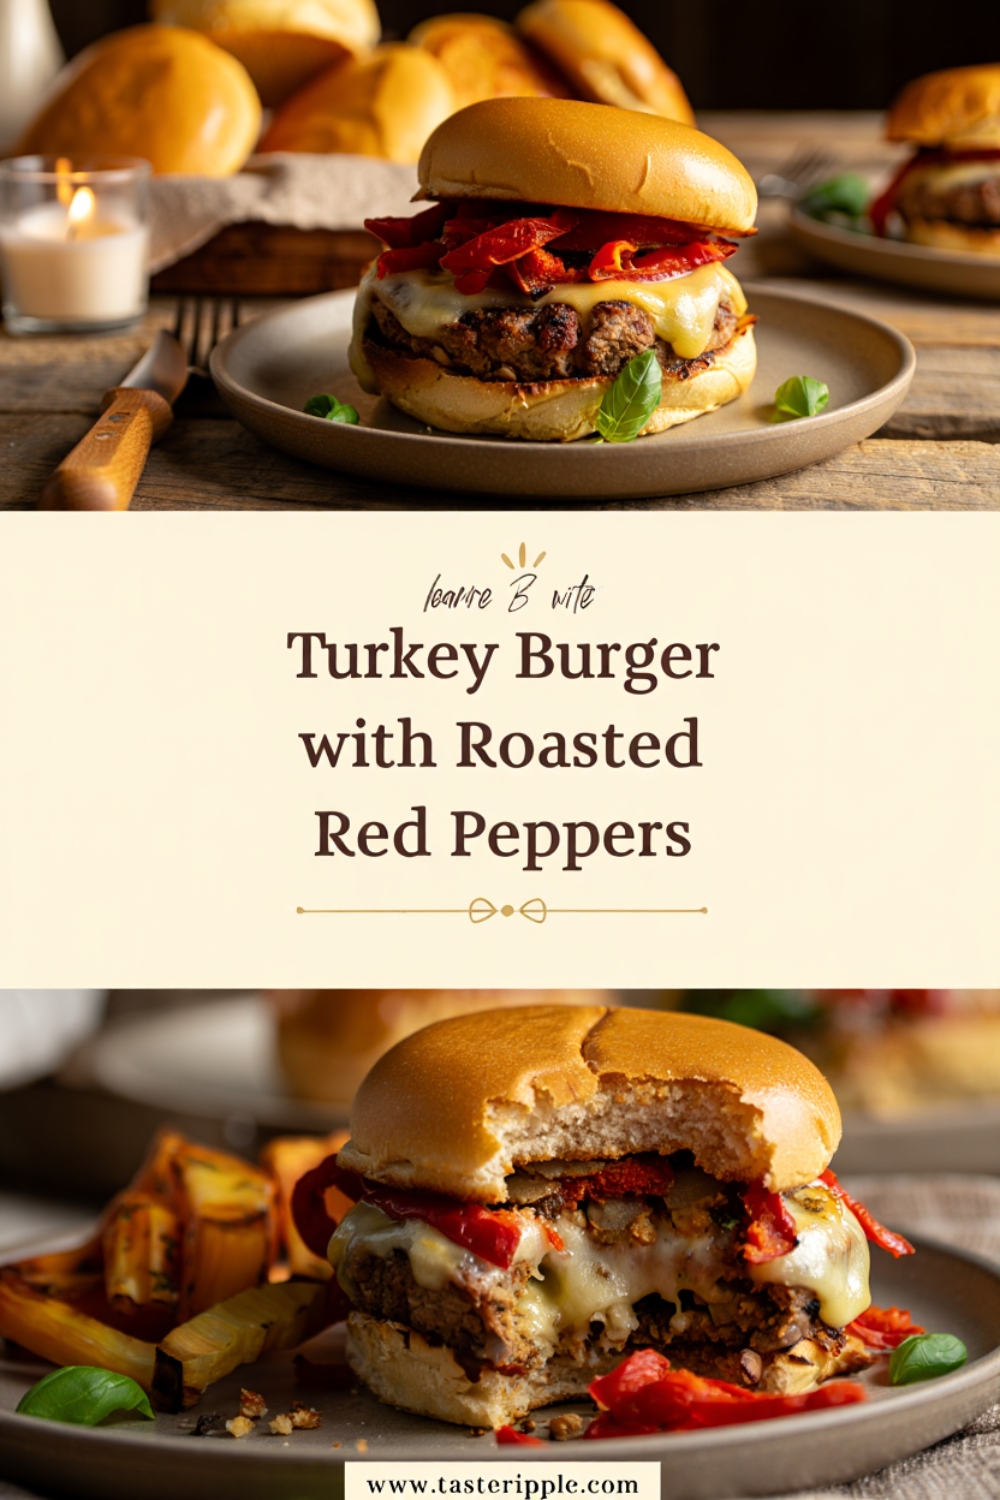
What Makes This Turkey Burger So Special
Most people think turkey burgers are inherently boring, and honestly, that assumption isn’t entirely wrong—if you’re just grinding up turkey breast and calling it a day, yeah, you’re gonna have problems. But when you build flavor intentionally, when you understand the science of what happens to ground poultry during cooking, you can create something that’ll make people forget they’re not eating beef entirely. The roasted red peppers aren’t just a garnish here; they’re structural elements that contribute moisture, natural sugars, and depth that ground turkey desperately needs.
What makes this recipe genuinely different is the approach to balancing moisture with texture. Turkey’s lean nature means it can dry out quicker than beef or pork, which is why so many attempts fail miserably. By incorporating roasted red peppers directly into the patty—not just on top, but mixed through the ground meat—you’re creating a matrix that holds moisture and releases it gradually during cooking. You’re also adding natural pectin and fiber from the peppers, which helps bind everything together. The result is a burger that stays juicy without becoming mushy, that holds together beautifully on the grill or pan, and that tastes genuinely complex and interesting.
The sweet-and-smoky profile comes from layering multiple umami sources and cooking techniques. We’re talking smoked paprika (not regular paprika—theres actually a meaningful difference in flavor intensity), a touch of brown sugar or honey to amplify the natural sweetness from roasted peppers, and proper searing technique that creates a caramelized crust. This crust isn’t just about texture; it’s where the Maillard reaction creates literally hundreds of new flavor compounds that weren’t present in the raw ingredients.
Ingredients & Substitutions
Let me break down exactly what you need for this burger, and I’ll be real about why each ingredient matters. I’m gonna give you measurements for four generous burgers—the kind you actually want to sink your teeth into, not those pathetic thin discs some people call a burger.
| Ingredient | Amount | Notes & Substitutions |
|---|---|---|
| Ground turkey (93/7 lean) | 1 lb | Use thigh meat if possible—it’s less dry. Ground chicken is too delicate; pork adds richness but changes the profile entirely |
| Roasted red peppers | ½ cup | Fresh roasted is ideal; jarred works fine if packed in water (not oil). Don’t use raw peppers—you need the concentrated sweetness from roasting |
| Panko breadcrumbs | ¼ cup | Regular breadcrumbs work but panko gives better texture. Alternatively, use crushed crackers or even finely grated zucchini for lower-carb |
| Egg | 1 large | This is your binder. Crucial for hold-together-ness. No substitution really works here |
| Smoked paprika | 1 tsp | This is non-negotiable. Regular paprika is basically dirt by comparison. Hungarian or Spanish smoked paprika both work beautifully |
| Garlic powder | ½ tsp | Fresh minced garlic (about 2 cloves) can work but uses up more moisture |
| Onion powder | ½ tsp | Again, fresh diced onion is possible but adds moisture—you’d need to adjust breadcrumbs upward |
| Brown sugar | 1 tsp | Honey, maple syrup, or even a touch of balsamic vinegar as substitutes. The goal is subtle sweetness |
| Salt | ¾ tsp | Kosher salt, preferably. About ¼ tsp less if using table salt (it’s denser) |
| Black pepper | ¼ tsp | Freshly cracked makes a noticeable difference |
| Worcestershire sauce | ½ tsp | This is where hidden umami comes from. Soy sauce or tamari for gluten-free; fish sauce if you’re brave |
| Red pepper flakes | ⅛ tsp | Optional but recommended—adds complexity without obvious heat |
A quick note on the turkey itself: the 93/7 ratio is important here. That 7% fat is crucial. Ground turkey breast (which is 99% lean) will absolutely dry out on you. I learned this the hard way, and it wasn’t pretty. If you can get ground turkey thighs, that’s actually even better—the higher fat content naturally creates more flavorful burgers that stay juicier. Just be prepared that thigh meat might be harder to source than the standard grocery store stuff.
The roasted red peppers deserve special attention because this ingredient is where a lot of people mess up. If you’re using jarred roasted peppers, make absolutely sure they’re packed in water, not oil. The oil will mess with your binding and create a greasy burger. If they come in oil, drain them thoroughly and pat them dry. Better yet, roast your own if you have the time. It takes maybe twenty minutes in a 425°F oven, and the flavor difference is genuinely noticeable. Fresh-roasted peppers have this concentrated sweetness and depth that jarred versions can’t quite match, no matter what the label says.
The breadcrumbs act as a binder and also help distribute moisture evenly throughout the patty. If you go too heavy on the breadcrumbs, you’ll end up with something that tastes more like meatloaf than a burger. Too light, and you’ll get a dry, crumbly mess that falls apart on the grill. That quarter-cup measurement is dialed in specifically for the moisture content of roasted red peppers and ground turkey. If you’re using fresh roasted peppers that are particularly wet, bump the breadcrumbs up to slightly more.
Step-by-Step Instructions
Here’s where technique becomes everything. This isn’t complicated, but precision matters.
Step 1: Prepare Your Ingredients
Get your roasted red peppers chopped into small pieces—not minced into oblivion, but small enough that they integrate with the meat. You want bits you can actually see and taste, not dissolved into a paste. Pulse them in a food processor if you want, but keep the texture rough. Measure everything out and have it ready before you touch the turkey. This matters because ground turkey warms up quickly, and you don’t want it sitting around at room temperature while you’re scrambling to find the paprika.
Step 2: Combine Ingredients Gently
This is where I see people get it completly wrong. They start squishing and mixing like they’re making bread dough, which immediately overworks the protein structure and makes the burgers dense and tough. Here’s what you actually do: put your ground turkey in a large bowl. Add the chopped roasted red peppers, breadcrumbs, egg, and all the dry seasonings. Using your hands—and this is important—mix gently and loosely, using a kind of folding motion rather than aggressive squishing. Think of it like you’re folding delicate ingredients into whipped cream. You’re aiming for just-combined, not thoroughly homogenized. The mixture should still look slightly loose and chunky, not uniform and paste-like.
Step 3: Form the Patties
Divide your mixture into four equal portions. Here’s something most people don’t do: make a little dimple in the center of each patty with your thumb. This sounds silly, but it actually prevents the burger from puffing up too much during cooking. The dimple gives the meat somewhere to expand into without creating a dome that won’t fit on your bun. Make the patties roughly ¾ inch thick—thick enough that they stay juicy inside while developing a nice crust outside. If you make them too thick, the inside stays cold and raw while the outside burns. Too thin, and they dry out completely.
Step 4: Chill Before Cooking
Put these patties in the fridge for at least 30 minutes, ideally an hour or more. This isn’t just busy-work. This helps the mixture firm up, which means the burgers will hold together better on the grill. Cold burgers also cook more evenly—the outside has time to develop that beautiful crust before the inside overcooks. I’ve seen people skip this step and regret it immediately when their burgers fall apart on the grill.
Step 5: Cook with Proper Heat
Here’s where the magic happens. Heat your grill to medium-high or get a cast-iron skillet screaming hot on the stove. You want the cooking surface hot enough that the burger immediately develops a golden-brown crust without sticking. This crust is crucial. It’s not just for looks; it’s where flavor compounds form through the Maillard reaction. If your cooking surface isn’t hot enough, the burgers just sort of steam in their own juices and never get that caramelized edge.
Place your burgers on the heat and don’t touch them. Seriously. I cannot stress this enough. Let them cook undisturbed for about 4-5 minutes on the first side. You’re looking for that deep golden-brown color. Flip once—just once—and cook for another 3-4 minutes on the second side. The second side cooks faster because the inside is already warm. You’re aiming for an internal temperature of 165°F, measured with a meat thermometer in the thickest part of the burger. Turkey’s lower fat content means it needs to be cooked through; you can’t do rare or medium-rare here without risking foodborne illness.
Step 6: Rest Before Serving
This is overlooked constantly. Let your cooked burgers rest for 3-5 minutes on a warm plate or cutting board before eating them. This allows the juices to redistribute throughout the meat instead of running all over your plate the second you bite into it. It’s a brief pause that makes a dramatic difference in the final result.
Common Mistakes and How to Avoid Them
The biggest mistake people make is over-seasoning the turkey mixture while it’s cold, then having it taste too intense once cooked. Ground turkey is porous and absorbs flavors intensely. Err on the side of subtle seasoning; you can always add more when you serve, but you can’t take it out. Another frequent problem is using ground turkey breast instead of a fattier cut. That 99% lean stuff simply doesn’t have enough fat to stay moist through the cooking process. You’ll get a burger that’s got the texture of a compressed sponge, and no amount of roasted peppers can save that situation.
People also constantly add too much moisture to the mixture through over-chopped peppers or through not draining jarred peppers properly. This creates a wet mixture that refuses to hold together on the grill. If your mixture looks too wet before cooking, add breadcrumbs a tablespoon at a time until it holds together properly. Finally, folks rush the cooking process by using insufficient heat or by flipping constantly. Both of these approaches prevent proper crust development and result in a burger that’s simultaneously dry and bland.
Cooking Techniques & Science Explained
Let’s talk about what’s actually happening when you cook this burger, because understanding the science makes you a better cook. Ground turkey is about 75% water by weight, which is why moisture management is so critical. When you cook it, that water wants to escape, which is why turkey can dry out so quickly. By incorporating roasted red peppers—which are about 92% water—you’re adding a significant amount of moisture that’s bound into the food matrix through cooking. The Maillard reaction, that beautiful browning you see on the exterior, converts proteins and sugars into hundreds of new flavor compounds that taste complex and savory. This reaction only happens efficiently above about 300°F, which is why proper heat is non-negotiable.
The roasting process applied to the peppers is significant. Raw red peppers have a fresh, slightly grassy quality. When you roast them, the natural sugars caramelize, the starches break down, and moisture concentrates. This is why jarred roasted peppers taste so different from raw ones—you’re starting with an already-transformed ingredient. The smoked paprika adds compounds that our brains interpret as smoke flavor, even though no actual smoke is involved. This is why you can’t just use regular paprika; they’re literally different chemically.
The resting period after cooking serves a purpose rooted in basic food science. When muscle tissue heats up, the proteins contract and squeeze out moisture. Resting allows those proteins to relax slightly, and the carryover heat gently finishes cooking the interior while giving the surface time to set. The result is more even moisture distribution and a juicier final product.
How to Store & Reheat
Raw burger patties can be refrigerated for up to 24 hours in an airtight container, though honestly they’re best cooked within a few hours of forming. They freeze beautifully for up to three months—just make sure they’re wrapped individually in plastic wrap before going into a freezer bag. This prevents them from sticking together into one frozen blob.
Cooked burgers last about three days refrigerated in an airtight container. Reheating is straightforward: place them in a skillet over medium heat with just a tiny splash of water to keep them moist, cover loosely, and heat until warmed through, about 3-4 minutes per side. You can also microwave them wrapped in a damp paper towel, though this doesn’t restore crispness to the exterior. Frozen cooked burgers can go from freezer to skillet—just add an extra minute or two to the reheating time.
Variations & Substitutions for Every Dietary Need
Gluten-Free Version
Replace panko with crushed gluten-free crackers or finely ground almond flour. The cooking method and everything else remains identical. Almond flour actually creates a slightly finer texture that some people prefer, though it does add a subtle nuttiness to the flavor profile.
Spicier Version
Increase the red pepper flakes to ¼ teaspoon and add a teaspoon of cayenne pepper to the mixture. You can also mix some sriracha or hot sauce into the roasted red peppers before adding them to the turkey. The heat builds nicely without overwhelming the other flavors.
Vegan/Plant-Based Version
This is trickier but absolutely doable. Use finely crumbled extra-firm tofu mixed with cooked black beans as your base instead of turkey. Aim for a ratio of about 6 ounces tofu to 6 ounces black beans. Add the same seasonings and roasted red peppers, but increase the binder: use a flax egg (1 tablespoon ground flaxseed mixed with 3 tablespoons water) plus 1 tablespoon cornstarch. Chill thoroughly before cooking, and be extra gentle when forming patties since plant-based burgers are more delicate. Cook at medium heat slightly lower than you would with turkey to prevent burning before the interior sets.
Low-Carb/Keto Version
Skip the breadcrumbs entirely, or use finely chopped nuts like almonds or walnuts as a binder. You might need to add another egg white for binding. Everything else stays the same. The texture will be slightly more tender without the breadcrumbs but equally delicious.
Mediterranean Version
Add crumbled feta cheese (about ⅓ cup), dried oregano (1 teaspoon), and a touch of lemon zest to the mixture. Use sun-dried tomatoes instead of some of the roasted red peppers for complexity. This completely changes the flavor profile to something more Mediterranean and works brilliantly with tzatziki sauce.
Serving & Pairing Suggestions
Presentation matters, and a turkey burger deserves to be treated with respect. Toast your buns lightly—this prevents them from getting soggy and adds a subtle textural contrast. I prefer brioche or pretzel buns for their sweetness and structure, though toasted sourdough adds a pleasant tang that complements the peppers beautifully.
Plating-wise, consider building your burger thoughtfully. Start with the toasted bottom bun, then a spread of aioli or mayo, then some fresh lettuce or arugula for crunch. Place your burger on the lettuce, then top with additional roasted red peppers (they deserve the starring role), a slice of cheese if you’re going that direction, and finish with the top bun. Fresh herbs like cilantro or basil brighten everything up and add visual interest.
Side pairings deserve thoughtful consideration. Crispy sweet potato fries echo the sweetness in the burger and pair gorgeously with the smoky notes. A fresh coleslaw dressed with a lime-vinegar dressing cuts through the richness. Grilled corn with a touch of smoky seasoning mirrors the burger’s flavor profile. Simple roasted vegetables work beautifully too—zucchini, eggplant, tomatoes, all of it complements rather than competes.
Beverage pairings are surprisingly important. A crisp pale ale or blonde ale with citrus notes balances the smoky sweetness beautifully. If you’re going non-alcoholic, a cold ginger beer or a freshly made lemonade works wonderfully. The acidity cuts through the richness while the slight spice or brightness mirrors the pepper forward nature of the burger.
For casual outdoor eating, this burger absolutely owns a picnic setting. For something slightly more elevated, you could serve these at a dinner party or special occasion. They’re sophisticated enough that your guests won’t realize turkey can actually be delicious. The burger works equally well for weeknight cooking or weekend entertaining.
Best Time to Serve This Dish
Honestly, this turkey burger is exceptional during grilling season when you have access to good charcoal or can get your outdoor cooking setup really hot. The direct heat from a grill creates a superior crust to pan-cooking, though you can certainly make these year-round on a stovetop if needed.
Summer is obviously prime burger season, but these are actually fantastic in early fall when you’re transitioning out of the heat. The sweet-and-smoky profile feels seasonal without being limited to one particular time of year. They work wonderfully for lunch or dinner, and honestly, they’re not bad as a next-day cold item with a good mustard or mayo.
I’d avoid making these for a crowd unless you’re prepared to cook them in batches or have multiple cooking surfaces. They’re best served fresh off the heat, not kept warm under a heat lamp. If you’re entertaining, prep the patties ahead of time and cook them to order as your guests arrive.
Cooking Tools That Actually Matter
A meat thermometer is non-negotiable. You absolutely need one to verify that your burger reaches 165°F. A simple instant-read digital thermometer runs about fifteen dollars and will serve you well for years. Without it, you’re guessing, and guessing with poultry is a foodborne illness waiting to happen.
A good cast-iron skillet—seasoned and well-maintained—creates superior results to most non-stick pans. The heat retention is exceptional, and the surface naturally encourages that beautiful crust development. If you don’t have cast-iron, a stainless steel skillet works fine, just preheat it thoroughly. Non-stick pans tend to prevent proper browning.
A quality spatula matters more than people think. Get one that’s thin and flexible enough to slide under a burger without breaking it apart, but sturdy enough that it doesn’t bend excessively. Metal or silicone work equally well; I prefer thin metal for the feel and control it provides.
A food processor saves time when chopping roasted peppers, though a knife and cutting board work perfectly fine if that’s what you’ve got. The key is just not over-processing; you want visible pepper pieces, not paste.
Troubleshooting Guide
If your burgers are falling apart on the grill, you likely either over-mixed the initial ingredients or didn’t let them chill long enough. Remeber, gentle folding, not aggressive mixing. Also ensure your cooking surface is hot enough—if it’s not sufficiently preheated, the exterior won’t set quickly enough to hold the patty together as the interior warms.
If they’re coming out dry, you probably either used too-lean turkey, didn’t chill them adequately, or cooked them too long. Check your internal temperature; turkey can actually dry out if you push it much past 165°F. Also verify that your roasted peppers were actually drained—wet peppers are crucial for moisture.
If the external crust isn’t forming, your heat isn’t hot enough. Get that cooking surface screaming. The burger should immediately sizzle and smell amazing when it hits the pan.
If the flavors taste muted, you might be using regular paprika instead of smoked paprika—it’s a dramatically different product. Also check that your brown sugar or honey actually made it into the mixture; don’t ask me how many times I’ve forgotten this crucial ingredient.
Conclusion
This turkey burger represents everything that’s beautiful about understanding food science and applying technique intentionally. It proves that turkey doesn’t have to be boring, that lean proteins can absolutely be delicious when you respect their limitations and build flavor systematically. The roasted red peppers aren’t an afterthought; they’re the foundation that makes this burger work—adding moisture, natural sweetness, and depth that ground turkey alone simply can’t provide.
The sweet-and-smoky profile feels sophisticated and modern while remaining approachable and straightforward to execute. This is the kind of burger you’ll find yourself making regularly, not just occasionally. It’s excellent for weeknight dinners when you want something interesting but uncomplicated. It’s equally at home at a summer barbecue, a dinner party, or packed into a picnic basket for eating outdoors.
The key takeaway is that burger excellence comes from respecting your ingredients and understanding why each component matters. The roasted peppers, the smoked paprika, the careful mixing technique, the proper heat, the resting period—none of these are optional extras. They’re the foundation of a burger that actually lives up to its potential. Turkey has gotten a bad reputation unfairly, and recipes like this help prove that reputation is based on poorly-executed versions, not on any inherent flaw with the protein itself.
Make these burgers. Serve them to people who think they don’t like turkey. Watch their faces change. That moment when someone realizes that turkey can actually be delicious? That’s why I cook. That’s exactly why this recipe matters beyond just being another burger option.
FAQs
Q: Can I make these burgers ahead and freeze them before cooking?
A: Absolutely. Form your patties, wrap each one individually in plastic wrap, then store them in a freezer bag. They’ll keep for up to three months. You can cook them straight from frozen, though they’ll take about an extra 2 minutes per side. Just thaw them in the fridge overnight for more even cooking, and they’ll cook exactly like fresh patties.
Q: What’s the difference between ground turkey from the store and ground turkey thighs?
A: Store-bought ground turkey is usually from the breast, which is about 99% lean. Ground turkey thighs are significantly fattier (around 85-90% lean) and create naturally juicier burgers. If you can get thighs ground fresh at a butcher counter, do it. The difference is genuinely noticeable. If your store only has regular ground turkey, stick with the 93/7 lean option rather than the ultra-lean breast versions.
Q: Can I use fresh roasted peppers instead of jarred?
A: Yes, absolutely. Fresh-roasted peppers actually taste even better than jarred. Roast them at 425°F for about 20 minutes until the skin is charred. Let them cool, then peel off the skin, remove the seeds, and chop them. The flavor depth is noticeably superior, though jarred peppers work perfectly fine if that’s what you’ve got available.
Q: How do I know when the burger is cooked through?
A: Use a meat thermometer to check that the internal temperature reaches 165°F, measured in the thickest part of the burger. This is a food safety requirement for poultry. You can also cut into the thickest part to verify there’s no pink interior, though the thermometer is more reliable.
Q: Can I grill these or do they have to be cooked in a pan?
A: Grilling produces superior results because of the direct heat and the char marks you can achieve. That said, these cook beautifully in a cast-iron skillet or any heavy-bottomed pan on the stovetop. Just ensure whatever cooking surface you use gets sufficiently hot to develop that important crust.
