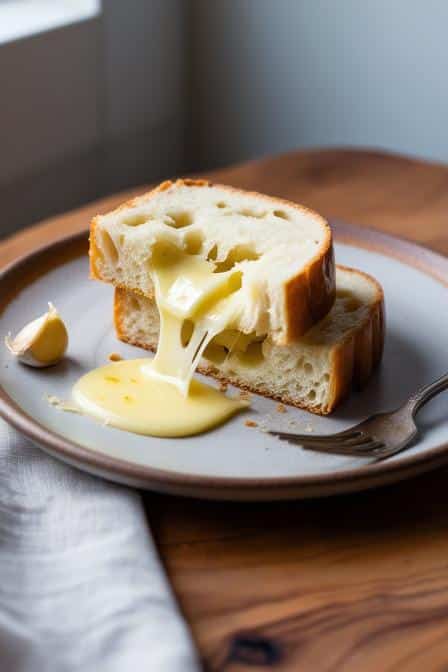
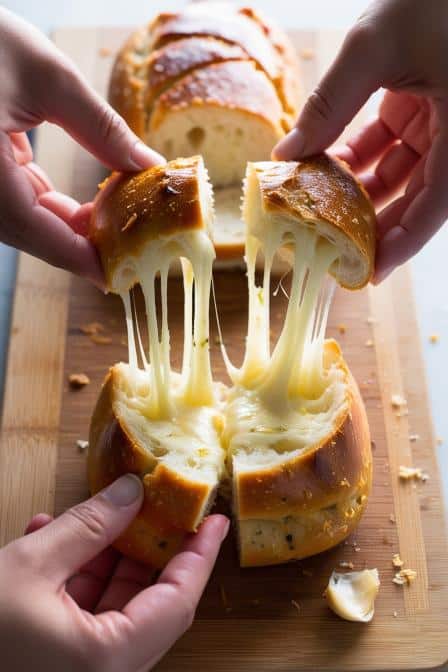
You ever had a dish so good it made you stop mid-bite and just… smile? That’s what happened to me the first time I tore into a slab of homemade gooey garlic cheese bread. It wasn’t even planned. I had leftover pizza dough, a half-brick of mozzarella dying in the fridge, and enough garlic to scare off every vampire in a 10-mile radius. That hodgepodge came together in a bubbling, stretchy, garlicky miracle.
It’s simple, right? Bread. Cheese. Garlic. But if that’s all you think this dish is, you’re in for a surprise. Gooey garlic cheese bread is a whole emotional experience. It’s comfort food dialed up. Like garlic bread and pizza had a beautiful, carb-laden baby. It’s one of those rare things where technique, timing, and ingredient quality actually make a world of difference. And that’s where we’re headed today.
Let’s not just make it. Let’s master it.
What Is Gooey Garlic Cheese Bread and Why It Deserves Respect
At its heart, gooey garlic cheese bread is an open-faced bread dish topped with garlic butter and layers of melty, stretchy cheese—usually mozzarella—with a supporting cast of other cheeses, herbs, and maybe a hint of spice. You bake it till bubbly and golden. That’s it.
But here’s what makes it special.
First, it’s versatile. Serve it as a side, a starter, a midnight snack, or the main event with a bowl of tomato soup or a salad (but let’s be honest, we ain’t here for salad). Second, it’s a technique-forward recipe, even if it don’t look it. The way you roast your garlic, the butter infusion, the cheese layering—all that jazz makes or breaks it.
Third—maybe most importantly—it brings people together. You serve a tray of this at a dinner party, and I promise you, the room hushes. It’s like pulling fresh cookies out the oven but savory. And louder.
Ingredients & Substitutions
This isn’t a “use whatever” kinda recipe. Quality matters. That said, let’s be real: not everyone’s got artisanal buffalo mozzarella or fresh parsley sprigs just hangin’ around.
Here’s what you’ll need and how you can swap stuff smartly:
Ingredient Table
| Ingredient | Purpose | Substitutions & Notes |
|---|---|---|
| 1 loaf of crusty bread | The base; thick & chewy is ideal | French baguette, ciabatta, or focaccia all work great |
| 1 bulb of garlic | Roasted for deep flavor | 1.5 tsp garlic powder (if desperate, but not preferred) |
| 6 tbsp unsalted butter | Carries the garlic flavor | Olive oil (vegan), plant-based butter |
| 1.5 cups mozzarella cheese | Stretch & melt | Provolone, gouda, or vegan mozzarella alternatives |
| 1/2 cup parmesan cheese | Sharpness & depth | Pecorino Romano, nutritional yeast (for vegan version) |
| 1 tbsp chopped parsley | Fresh, herby finish | Dried parsley or fresh basil |
| Pinch of red pepper flakes | Gentle heat | Chili flakes, cayenne, or omit |
| Salt to taste | Enhances everything | Kosher salt preferred for better pinch control |
Pro tip: Don’t skimp on the cheese quality. Use full-fat mozzarella. None of that pre-shredded, powder-coated stuff. It melts weird and tastes off. Freshly shred it if you can. Your bread will thank you.
Roasting the garlic is non-negotiable in my kitchen. Raw garlic hits you like a punch in the face. Roasted garlic whispers sweet nothings. Big difference.
Step-by-Step Instructions
This ain’t a complicated recipe, but the details make it sing. Miss one cue and you’ll end up with soggy bread or cheese that won’t melt.
Step 1: Roast the Garlic
Cut off the top of a whole garlic bulb, exposing the tops of the cloves. Drizzle with olive oil, wrap in foil, and roast at 375°F (190°C) for about 35–40 minutes. It should be soft, caramelized, and easy to squeeze.
Tip: You can roast garlic days in advance. Store it in the fridge submerged in olive oil. Boom. Flavored oil bonus.
Step 2: Prep the Garlic Butter
In a bowl, mash the roasted garlic cloves into softened butter with a fork. Add salt and a pinch of red pepper flakes. Mix till smooth.
If your butter’s cold, microwave it just a few seconds. Don’t melt it fully—it needs to be spreadable, not pourable.
Step 3: Slice and Toast the Bread
Slice your bread lengthwise if it’s a loaf. If it’s already sliced, just lay the pieces flat on a baking sheet. Lightly toast in the oven for 5–6 minutes till just golden. This step keeps the final result from going soggy.
Step 4: Layer the Good Stuff
Spread that garlic butter generously across each slice. Be aggressive. Don’t be shy. Cover edge to edge.
Now sprinkle mozzarella all over. Then the parmesan. Then the parsley. Layers matter. Mozzarella needs to be in direct contact with the bread to melt properly.
Step 5: Bake
Pop it in a 400°F (205°C) oven for 10–12 minutes. Switch to broil for the last 1–2 minutes for that bubbly, golden, slightly crispy cheese top.
Mistake to Avoid: Don’t walk away during the broil. I’ve ruined more garlic breads than I’d care to admit by trusting a timer and not my eyes. Watch it.
Cooking Techniques & The Science Behind It

Why We Roast Garlic
Roasting breaks down the sulfur compounds in garlic that make it sharp and aggressive. What’s left behind is mellow, sweet, and spreadable. Think garlic candy.
Why Butter Matters
Butter helps distribute heat evenly across the bread and melds the flavors. Using unsalted butter gives you full control over seasoning. Salted can vary wildly brand to brand.
Why Cheese Layering Is Critical
Mozzarella on the bottom melts into the bread, giving you that gooey pull. Parmesan on top gives that nutty crisp. Parsley last so it don’t burn.
The Bread’s Role
Crusty bread is your foundation. Too soft and it’ll collapse under the cheese. Too dense and it won’t absorb the butter. Aim for something airy with a thick crust—ciabatta is perfect.
Storage & Reheating
Cool leftovers completely before storing. Wrap tightly in foil and keep in the fridge for up to 3 days.
To reheat: 350°F (175°C) oven for 10 minutes wrapped in foil, then another 2 minutes unwrapped to re-crisp the top. Microwaving will make it rubbery—don’t do it.
Variations & Substitutions
- Vegan Version: Use plant-based butter and vegan mozzarella. Add a sprinkle of nutritional yeast for that umami kick.
- Spicy Version: Add diced jalapeños, extra red pepper flakes, or even a drizzle of hot honey post-bake.
- Gluten-Free: Use a hearty gluten-free bread. Just be sure it’s sturdy enough to hold up under the cheese.
- Herb Explosion: Add chopped rosemary, oregano, or thyme to your butter mixture.
Useful Tools
- Microplane grater for fresh parmesan—makes it fluffy, not clumpy.
- Offset spatula for spreading butter evenly.
- Sheet pan with wire rack—lets heat circulate for even toasting.
- Broiler (or toaster oven) for last-minute crisping.
Serving & Pairing Suggestions
Slice into strips for sharing or serve whole for drama.
Pair it with:
- Creamy tomato soup
- Caesar salad
- Chili or beef stew
- A chilled glass of sauvignon blanc or even a cold lager
Want to go all-in? Serve it with marinara on the side for dipping. Instant crowd-pleaser.
Best Time to Serve or Eat This Dish
This is the golden child of the weekend kitchen. Perfect for movie nights, game days, or those “I’m too tired to cook but want something insane” evenings.
Also sneaky-good for brunch. Imagine it with a runny egg on top? Don’t even get me started.
Conclusion: Why This Recipe Rocks
Gooey garlic cheese bread isn’t just a recipe. It’s therapy with crust.
It’s one of those dishes where your hands smell like garlic and butter and you’re still licking your fingers after the last bite. Where people hover near the oven like moths. Where “just one more piece” becomes four.
What makes it magical is how humble it is. Nothing fancy. But when done right? Pure edible gold.
Final Tip: Don’t skip the roasting. Don’t cheap out on the cheese. And don’t you dare cut it before the cheese sets for a minute. It’s the little things.
FAQs
1. Can I make this ahead of time?
Yup. Prep everything and refrigerate. Bake when ready. Don’t pre-bake then reheat if you want the cheese pull magic.
2. What cheese is best for extra stretch?
Low-moisture, whole milk mozzarella. The fresher, the stretchier. Add a bit of provolone or fontina for bonus goo.
3. How do I keep the bread from getting soggy?
Toast it lightly before adding toppings. It creates a moisture barrier and keeps the bottom crisp.
4. Can I freeze leftovers?
Kinda. It’ll never be quite the same, but if you wrap it in foil and freeze, then bake from frozen at 375°F for 15 minutes, it’ll still be decent.
5. What’s the best bread to use?
Crusty, chewy bread like sourdough or ciabatta. Avoid soft sandwich loaves—they turn to mush.
—
So go ahead. Make it. Tear it. Share it. Or don’t share. I’m not judging.
Just don’t forget the napkins.

